Wednesday, September 23, 2009

Hearty Chicken Soup

DSC_0029

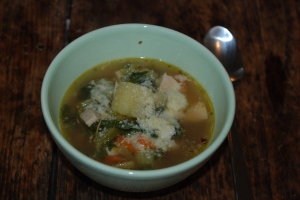
Cold season has hit!  Thankfully its just a cold and not the flu.  So the past few days have been spent drinking many cups of tea with honey and eating plenty of soup.  I'm not good at being sick...I have a hard time taking it easy and resting.  I always feel like I need to be doing something, and that usually means cooking/baking.  So the other day I had made a potato and corn chowder  but when I'm sick I want a clear broth...so tonight I made a hearty chicken soup.

Hearty Chicken Soup

1 tablespoon grapeseed oil

1 large shallot (or onion, I didn't have an onion so I used shallot)

3 celery stalks, diced

2 large carrots, diced

3 medium potatoes, diced

1 cup each firmly packed green and red chard roughly chopped

2 cloves of garlic, finely minced

1 table spoon dried oregano

1 table spoon rosemary chopped

1 teaspoon red pepper flakes

4 cups gluten free chicken broth

1 cup water

1-2 boneless skinless chicken breasts diced

salt and pepper to taste (shouldn't need to much with the chicken stock)

*try to dice the veggies all about the same time for even cooking.  I tend to dice mine bigger but I like the chunkiness of the soup.  I also don't peel my potatoes first, I like to leave the skin on, it adds a slightly different texture to the soup.

In a large pot heat one table spoon of grapeseed oil over medium heat.  Add shallot and cook for two minutes.  Add the celery and carrots and cook for an additional five minutes until softened.  Add potatoes, garlic, rosemary, oregano, and red pepper flakes.  turn heat to medium high and add one cup of water and four cups of chicken stock.  Bring to a boil for 5-10 minutes, add chicken and stir.  Once chicken has cooked through add the green and red chard, stir well.  Reduce heat to a simmer and continue to cook for an additional 10-15 minutes.  Enjoy with a little grated Parmesan cheese on top.

Saturday, September 19, 2009

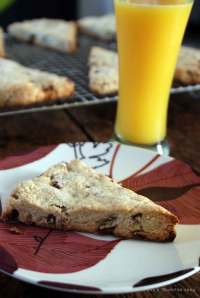
Cranberry Nut Scones

Scones21

I adapted this recipe that I found on the Four Chickens Blog.  I had been searching for something to bake today and went back to her blog to see if I could find a recipe to use with her Gluten Free Flour Mix (see recipe below) and sure enough I found one.

I took her basic recipe and added a few things to it: some dried cranberries, chopped pecans and lemon zest.

Cranberry Nut Scones

ngredients:
3 C. gluten-free flour mix (see below)

1/3 C. sugar

3 tsp. baking powder

1/2 tsp. baking soda

3/4 tsp salt

1/2 C. copped pecans

The zest of two small lemons or one large lemon

1/4 C. (or 1/2 C.) dried cranberries

6 oz cold butter (or dairy-free butter substitute--I used Earth Balance)

1 C. milk (or gluten-free soy milk) mixed with 4 T. vinegar--I used apple cider vinegar

Jeanne's Gluten-Free All-Purpose Flour Mix (mix together and store in fridge):
1 1/4 C. brown rice flour
1 1/4 C. white rice flour
1 C. tapioca flour
1 C. sweet rice flour (also known at Mochiko)
2 scant tsp. xanthan gum

Preheat oven to 425 degrees. Line baking sheet with a Silpat sheet.

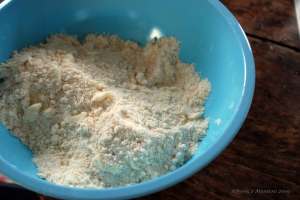
In a medium bowl, stir together flour, sugar, baking powder, baking soda, and salt.

Scones07

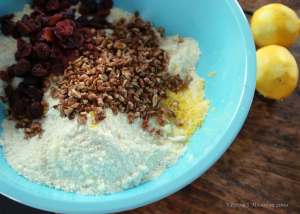
Add the cold butter pieces and using your fingers, (a pastry blender, or two knives), work the butter into the flour until the mixture resembles coarse corn meal. Don't worry about the larger nubs of butter--these add to the scones' flakiness.  Add in the cranberries, pecans and lemon zest.  Mix well.

Scones08

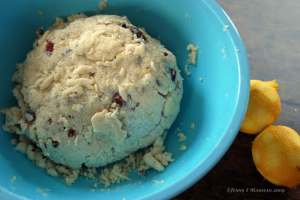
Slowly pour in the milk mixture--do this carefully, because you might not need it all. I used about 7/8s of the milk. The dough should be just barely wet. Use your hands to carefully mix in the last bits of flour. The dough should be extremely light and fluffy. Handle carefully.

Scones09

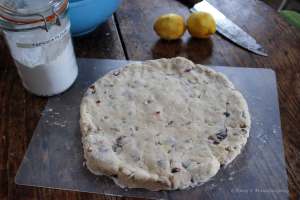
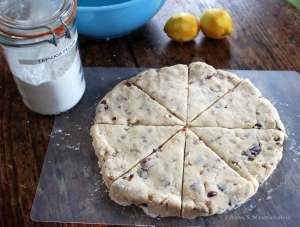
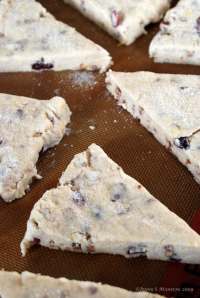
Turn out only a floured board.  I use tapioca flour to lightly flour a large cutting board and lightly press out the ball of dough until it is about 1/2 in thickness (you can also follow the original recipe and use a rolling pin and cut the scones according to Jeanne's instructions).  Cut in half and depending on how many scones you want to make cut each half in third or quarters.  Place the scones on the baking sheet lined with the Silpat sheet.  Lightly sprinkle each scone with sugar (if you have raw sugar use that, if not, regular white sugar will work just fine)

Scones11

Scones12

Scones14

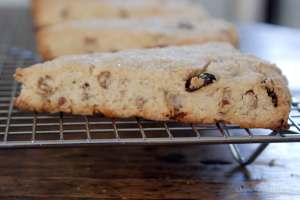
Bake the scones for 17-20 minutes. They are done when they are lightly golden on the top. Cool briefly (or as long as you can stand it before devouring them).

Scones18

Thanks Jeanne for another awesome recipe!

Wednesday, September 16, 2009

Gluten Free: Pizza and Bread Stick Dough

DSC_0002

DSC_0006

DSC_0809

Let me start this post by saying I did not create this recipe (I wish I did), however I can't remember where online I found it. I thought I had it bookmarked but sadly I do not and its not 100% accurate of the original. I only wrote down the Rice Flour Mixture and kind of guessed at the rest of the directions...wooops, but it turned out great, I promise!! I tend to find recipes and re-create them.

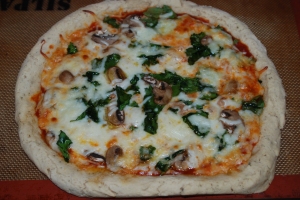
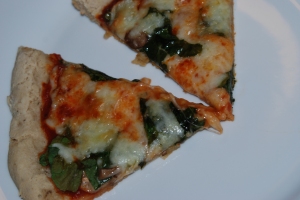
Tonight I made a gluten free spinach and mushroom pizza which was wicked good! I don't eat pizza much because to me its more of a snack food than a real meal. I have to have a salad or something with it for it to be a meal.

Pizza or Bread stick Dough

1.5 cups of Brown Rice Flour Blend (see recipe below)

1 teaspoon Xantham Gum

1/2 teaspoon Salt

2 Teaspoons Sugar

2 Teaspoons Italian Seasoning

1.5 Teaspoons Garlic Powder

1 Packet of Quick Rise Yeast (or one Tablespoon Yeast)

1 Teaspoon Olive Oil

3/4 Cup plus one Tablespoon Water at 110 Degrees

In a stand mixer add all of the dry ingredients including the Yeast. Heat water and olive oil to 110 Degrees and add to dry ingredients. Mix on low until combined and then on high for two minutes

For Bread Sticks:

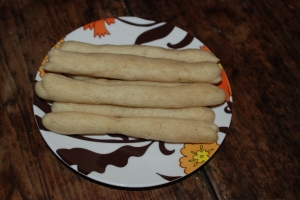
Add a little bit of oil to a zip lock bag and scoop dough into bag. Cut a small hole (not too big) in the corner of the bag and pipe out bread sticks (you should have about 8 bread sticks) on to either parchment paper or a silplat sheet. Cover with lightly sprayed plastic wrap in a warm place for 45 minutes. Heat oven to 375 degrees and bake for 20 minutes. For Garlic bread sticks - at the very end brush with melted butter or oil and a little bit of garlic.

For Pizza:

Scoop the dough onto a silplat sheet and spread out with lightly oiled hands (the dough is going to be sticky....let rise and reshape a bit). Cover with lightly sprayed plastic wrap in a warm place for 45 minutes. Once dough has finish rising a bit reshape into a medium - large pizza. Heat oven to 375 degrees and bake for 15 minutes. Take out and add sauce and toppings. Return to oven and bake for an additional 15-20 minutes.

Brown Rice Flour Blend

2 Cups Brown Rice

2/3 Cup Potato Starch

1/3 Cup Tapioca Flour

Blend well!  Store in an airtight container and keep in the refrigerator.

Tuesday, September 15, 2009

Gluten Free Cinnamon Rolls

GF0215w


I'm always searching for and creating new recipes.  I'm not the best at creating recipes when it comes to bread products and baking.  I haven't quite mastered how all these different flours work together.  So many times when it comes to baking recipes I search for them on other people's GF blogs.

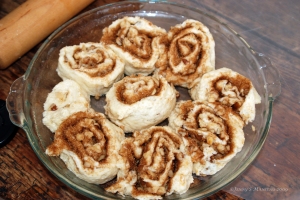
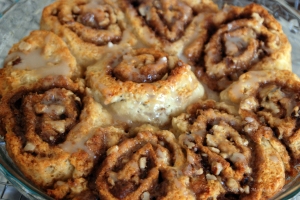
I found this blog called "I Am Gluten Free" the other day and found a recipe for Cinnamon Rolls.  These rolls are AMAZING!!  No lie...fantastic.  I made them the other day when my family was in town (all who aren't gluten free) LOVED them.  This is definitely a recipe I will make again and again.

I agree with the blogger of this recipe - these are so friggin' good.  These are as good (if not better) than the ones you get at the mall....oh you know which ones I'm talking about and yes I am saying they are as good if not better than them!!!   The original recipe was a little too sweet soooo I cut back on the filling a bit.   The original recipe is listed below with a link to the blog I found it on.    You have to give these a try...super easy recipe with awesome results....trust me you won't be disappointed, I promise!

Cinammon Rolls
Serves 8 or 9

INGREDIENTS
2 tablespoons shortening (I used butter)
1/4 cup sugar
2/3 cup of milk, room temperature
1 packet yeast (about 1 tablespoon) (*see Ellen's note at end of post)
1 egg
1/4 cup canola oil
1/2 cup potato starch
1 cup corn starch (someone subbed arrowroot successfully)
1/4 teaspoon baking soda
2 1/2 teaspoons xantham gum
2 teaspoons baking powder
1/2 teaspoon salt
1 teaspoon vanilla extract

TO SPRINKLE ON BOARD COVERED WITH PLASTIC WRAP
1 - 2 tablespoons sugar

FILLING (*see Ellen's note at end of post)
1 cup brown sugar
1 1/4 teaspoons cinnamon
1/3 cup chopped nuts - optional

GLAZE
¾ cup powdered or confectionery sugar
1 teaspoon vanilla extract
milk to thicken (I used soy milk)

DIRECTIONS
Preheat oven to 375 degrees.

In medium bowl, combine shortening and sugar. Mix well. Measure warm milk and add yeast to milk. Whisk well to fully dissolve (**see Ellen’s note).

Add milk/yeast to sugar mixture. Add remaining ingredients. Mix very well, being sure to remove all lumps. Dough will be quite soft (***see Ellen’s note).

Take a piece of plastic wrap and lay it out so it covers a 13 1/2" x 13 1/2" square. Sprinkle sugar on the wrap. Lay ball of dough on top of that. Then pull out another sheet of wrap and gently lay over the dough. Pat the dough down into a roughly squarish pancake. Lift the top wrap up and then reposition it. Use a rolling pin to roll out the dough in between the two layers of wrap. Occasionally you'll have to lift and reposition the wrap because it gets "stuck" under the edges. You might have to occasionally flip the whole thing over. Make sure that when you're done you've got ABOUT a 13 1/2" x 13 1/2" square of dough.

Remove top piece of wrap. Combine filling ingredients. Spread evenly across dough's surface. (Original recipe poster suggested leaving about a 1 1/2" sugar free edge because when you roll the dough all the sugar shifts and fills this in; otherwise all the sugar spills out).Use the bottom piece of wrap to lift the edge of the dough and start to roll it up forming a long cylinder. Start with the sugary edge, which will be the center of your roll and roll toward the sugarless edge. Cut off or trim up the irregular ends of your "log". Then cut into 8 or 9 slices of similar size, about 1 1/2" wide. Place rolls into a greased round glass pie pan.

Bake approximately 20 minutes, until tops are lightly browned.

Combine powdered sugar, vanilla, and milk to make glaze. The amount of milk you use will depend on how thick you want the glaze to be. Stir until all lumps are dissolved. Drizzle over warm rolls if desired.

Notes:
*I thought the rolls were a bit too sweet, so the next time I make them I will cut the amount of filling ingredients to about 2/3 of what the recipe calls for.
**It seems odd that the recipe doesn't call for proofing the yeast. I decided to cover the milk and yeast mixture with plastic wrap and allow it to at least begin proofing.
***The mixture is very, very soft - I was convinced that I'd made a mistake, but it ended up being fine.
GF0219w

Wednesday, September 9, 2009

For the love of cupcakes

cupcake0418w


I love cupcakes! I know I can't be alone in this but I would choose a cupcake over a piece of cake any day. They are cute and individualized...they just make me happy (and I'm pretty sure they make others happy to when I bake them and share the goods). I make them a ton, probably too much. But people have often asked where my love of cupcakes from and I never had a good answer, until last night that is!

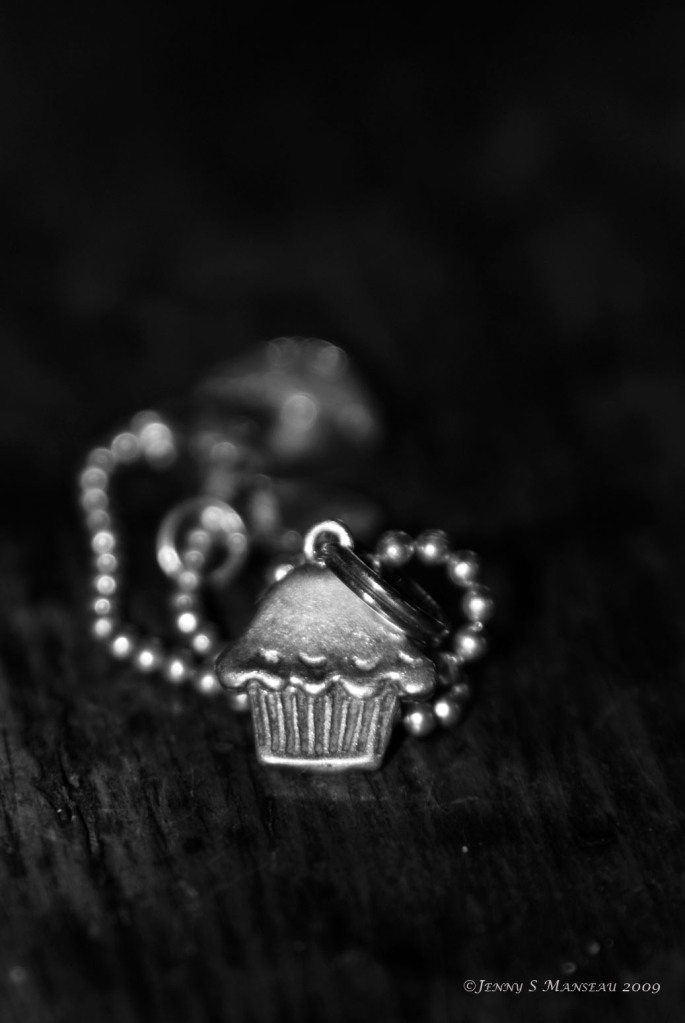
This week I'm getting ready for my sister, brother in law and nephew to come for a visit before they move to Australia for three years!! So I did some deep cleaning of the apartment, got rid of a few things and put some rings back in my jewelry box. In doing so I found my charm bracelet that was given to me about ten years ago. I don't wear it much and only have a few "charms" on it. I have a fish and scallop charms from my dad, my baby ring and a cupcake from Julie. The cupcake was my first charm. She use to call me her "little Cupcake".

I guess its to Julie that I owe my love of cupcakes!! Ten years ago this summer I fell in love with that charm and cupcakes.

I love baking cupcakes, playing with different frostings, food coloring, sprinkles etc. Like I said I bake these A LOT! Now with my family coming to town I'll be making another batch this weekend for my sisters 30th birthday celebration. She's pregnant with baby number two and is trying to eliminate sugar during this pregnancy, so I'm on a mission to create sugar free cupcakes and frosting. I have a cupcake recipe and I found a frosting recipe online so I'll be trying that this weekend and will be sure to post my results. Fingers crossed they turn out.

I love cupcakes to the point I will not have a cake at my wedding...there will be cupcakes, maybe even a "cupcake tree"!